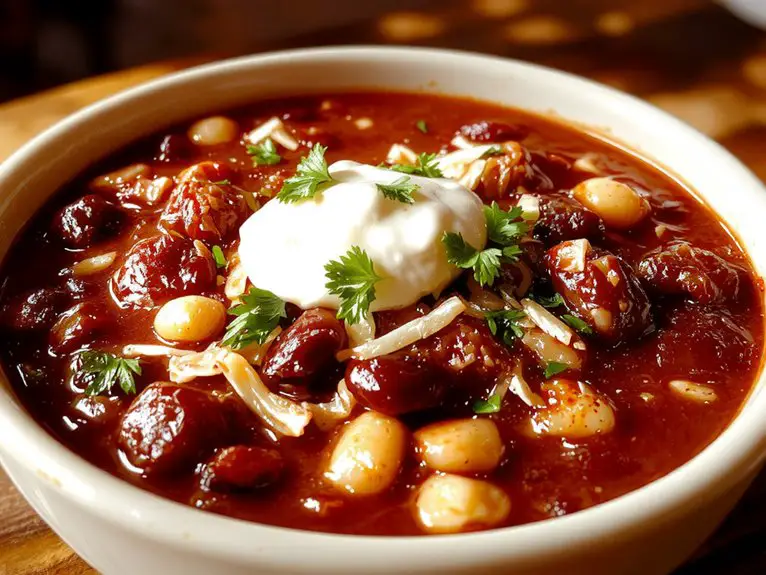
I’ve spent years refining my classic chili recipe, balancing smoky spices, tender beef, and just the right thickness. The secret isn’t just in the ingredients—it’s in the slow simmer that lets flavors deepen. Whether you prefer it mild or with a kick, this version delivers comfort in every bite. But there’s one unexpected twist that takes it to the next level, and it’s not what you might think.
Recipe
There’s nothing quite like a steaming bowl of classic homemade chili to warm you up from the inside out—and this recipe? It’s the kind of dish that’ll have everyone asking for seconds. Packed with rich, smoky flavors, tender beef, and just the right blend of spices, this chili is a guaranteed crowd-pleaser.
The secret? A slow simmer that lets the flavors meld into something downright magical, plus a touch of dark chocolate for depth (trust me, it works). Imagine tender chunks of meat, hearty beans, and a sauce so flavorful it clings to every bite.
Whether it’s game day, a cozy night in, or a potluck with friends, this chili delivers every time. And the best part? It’s easy enough for a weeknight but impressive enough to feel like a special occasion. Let’s get cooking!
Ingredients
A great chili starts with the right ingredients—each one building layers of flavor that make this dish unforgettable. Here’s what you’ll need, along with some pro tips to make your chili stand out:
- Ground beef (80/20 blend): The fat content adds richness. For a leaner option, use ground turkey or chicken, but don’t skip browning—it’s key for depth.
- Onion & garlic: Fresh is best here. Sauté until golden to release their sweetness. No fresh garlic? ½ tsp garlic powder per clove works in a pinch.
- Kidney beans (canned or dried): Canned saves time (rinse them well!), but dried beans soaked overnight give a creamier texture. Pinto beans are a solid swap.
- Crushed tomatoes: San Marzano tomatoes, if you can find them—their low acidity and sweetness balance the heat.
- Beef broth: Homemade or low-sodium store-bought. Swap in chicken or veggie broth if needed, but beef broth adds the deepest flavor.
- Chili powder, cumin, & smoked paprika: The holy trinity. Smoked paprika is non-negotiable—it adds that subtle smokiness.
- Dark chocolate or cocoa powder: A secret weapon! Just a square or a tablespoon deepens the flavor without sweetness.
- Masa harina (corn flour): The ultimate thickener. No masa? A cornstarch slurry (1 tbsp + 1 tbsp water) works, but masa adds a hint of corn flavor.
Little win: Top with fresh cilantro, sour cream, or shredded cheese—they’re not just garnish; they cut through the heat and add creaminess.
How to Make the Best Perfecting Classic Chili Techniques

– Brown the meat first: Heat oil in a large pot over medium-high heat. Add ground beef and cook until browned, breaking it into small pieces with a spoon. This step builds deep flavor—don’t rush it!
Drain excess fat if needed, but leave a little for richness.
– Sauté the aromatics: Add diced onions and minced garlic to the pot. Cook until onions are soft and translucent, about 5 minutes. This releases their sweetness and forms the flavor base.
Stir often to prevent burning.
- Toast the spices: Stir in chili powder, cumin, paprika, and a pinch of cayenne (if using). Let them cook for 1-2 minutes until fragrant. Toasting releases their oils, intensifying the taste—just don’t let them scorch.
- Deglaze with liquid: Pour in crushed tomatoes, beef broth, and a splash of beer or water, scraping up any browned bits from the pot. Those bits are packed with flavor!
Simmer for 10 minutes to meld everything.
– Add beans and simmer: Stir in drained kidney or pinto beans (or both!). Reduce heat to low and let the chili simmer uncovered for at least 30 minutes, stirring occasionally.
Longer simmering = deeper flavor.
– Adjust seasoning: Taste and add salt, pepper, or a dash of sugar if needed. If it’s too thick, add a bit more broth; too thin, simmer longer.
Chili should coat the back of a spoon.
– Rest before serving: Turn off the heat and let it sit for 10 minutes. This helps flavors settle and thickens the texture. Top with cheese, sour cream, or cilantro.
Pro Tips:
- For extra depth, brown the meat in batches to avoid steaming.
- Short on time? Use canned beans—just rinse them to reduce sodium.
- Chili tastes even better the next day! Store leftovers in the fridge for up to 3 days.
Watch Out:
- Don’t skip browning the meat—it’s key for flavor.
- Over-stirring breaks down the beans. Gentle folds keep them intact.
- Spice level too high? Add a spoonful of honey or a squeeze of lime to balance.
Nutrition
This homemade classic chili recipe provides a hearty and nutritious meal. Below is the nutritional information per serving.
| Nutrient | Amount |
|---|---|
| Calories | 300 |
| Protein | 20g |
| Fat | 10g |
| Carbohydrates | 30g |
| Fiber | 6g |
| Sugar | 8g |
| Sodium | 800mg |
Chef Tips
Once you’ve got the nutritional breakdown sorted, I’ll share some tricks I’ve picked up to make your chili stand out.
Toast your spices briefly to deepen their flavor. Brown the meat in batches for a better sear.
Simmer low and slow—patience is key. A splash of vinegar or lime juice brightens the dish.
Let it rest; flavors meld beautifully overnight. Trust me, it’s worth it.


